Create JSF 2.1, Primefaces 4.0, EJB, Restful Project, Using Maven, with JBoss AS 7, Postgres DB and Eclipse.

In this step by step “tutorial”, I will try to demonstrate how to create a new JSF 2.1 Project and add Primefaces 4.0 to it, alongside with EJB, JPA, REST.
I will use in this “tutorial”:
and Ubuntu as OS.
Contents:
- Create Project Using Maven. (1)
- Import and configure Eclipse Project. (2)
- Add Primefaces.(3)
Create Project Using Maven. (1)
Let’s call the project: lazyprime
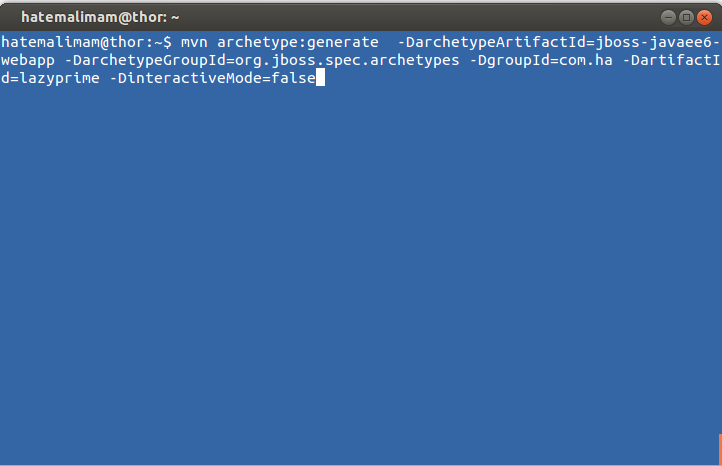
Open your terminal and execute the following command (make sure you have maven installed):
mvn archetype:generate  -DarchetypeArtifactId=jboss-javaee6-webapp
-DarchetypeGroupId=org.jboss.spec.archetypes
-DgroupId=com.ha -DartifactId=lazyprime -DinteractiveMode=false
This will create a JavaEE 6 Project, based on JBoss Artifact Template, Java EE 6 webapp, which has EJB, Hibernate, JSF and Rest Services already configured and exampled.
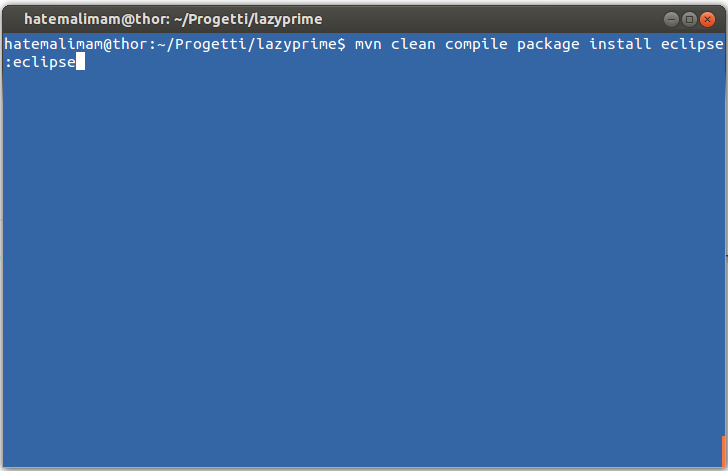
After creating the project we need to compile the project and make it ready to be imported by eclipse,
in order to do this run the following command from inside the created project folder:
mvn clean compile package install eclipse:eclipse
for more information on maven build lifecycle refer to this link.
Import and configure Eclipse Project. (2)
Now the project is ready to be imported by eclipse, open your eclipse and from the main menu click on File > Import > Existing Maven Project and follow the instructions.
After importing, right click on Project (lazyprime) > Properties > Project Facets > Convert to faceted form…
 then change Configuration to JavaServer Faces v2.1 Project
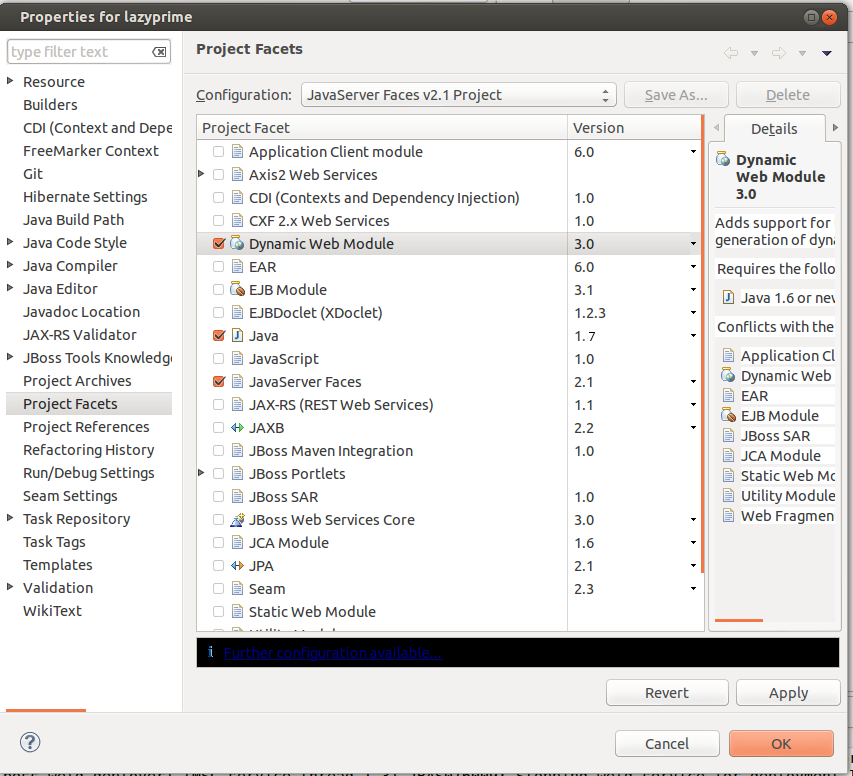
Make sure Dynamic Web Module is checked and the version is 3.0 and your Java is 1.7 (I like to work using 1.7 if you like you can keep it 1.6).
Click on further configuration available in the lower bar
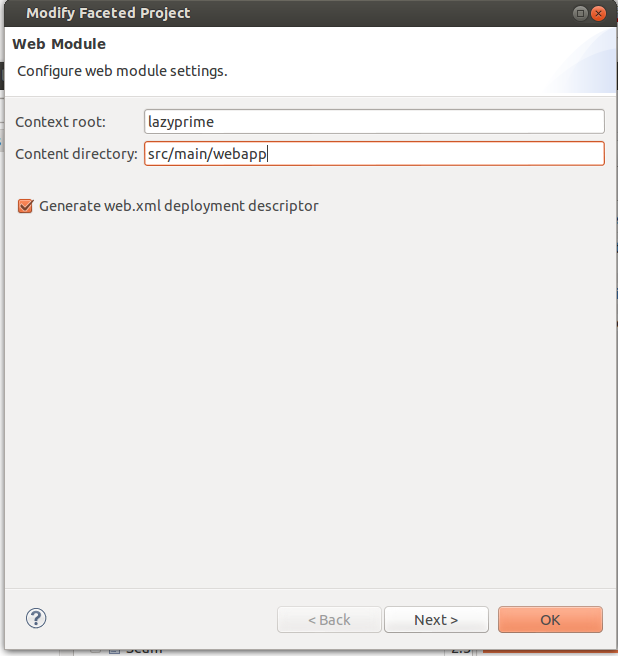
Change the content directory to src/main/webapp .
Next… JSF Implementation Library Type: Disable Library Configuration
Now right click on your project (lazyprime) > properties > Deployment Assembly > Add
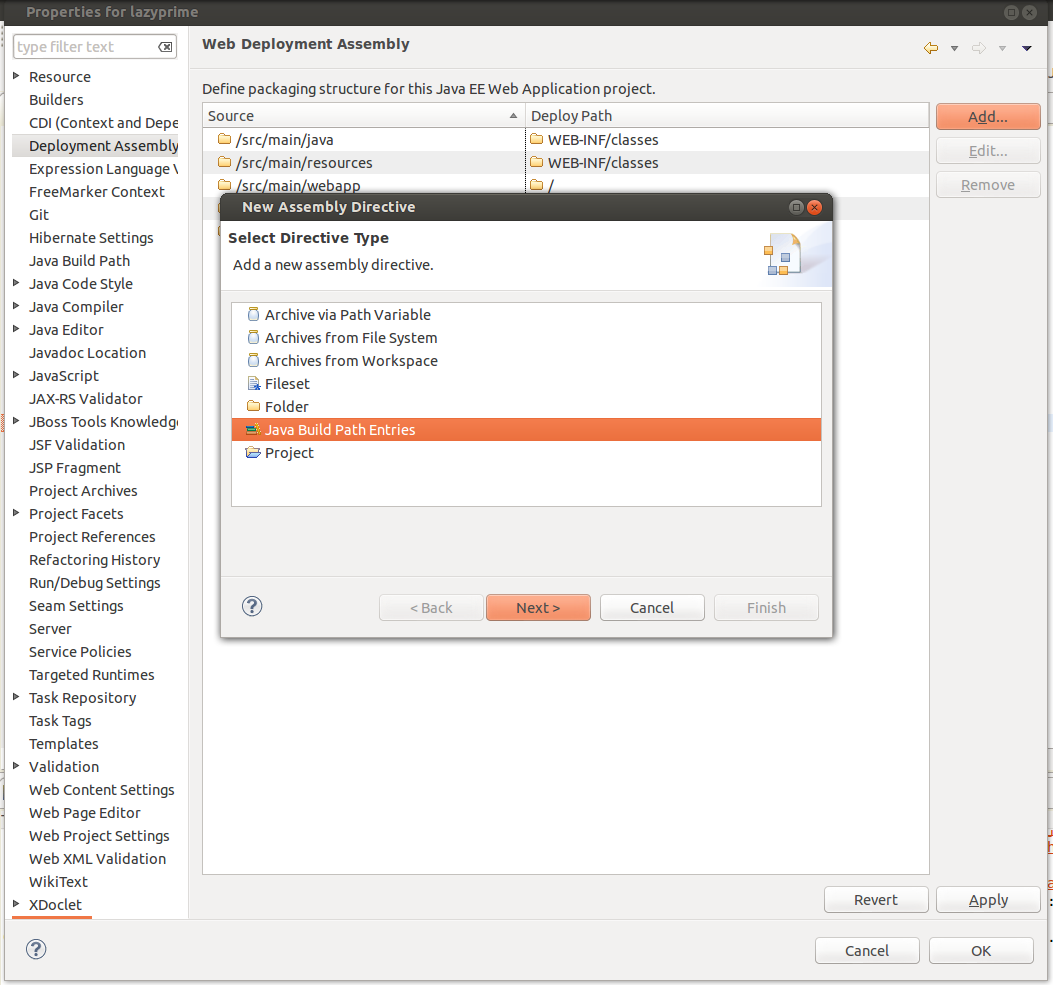
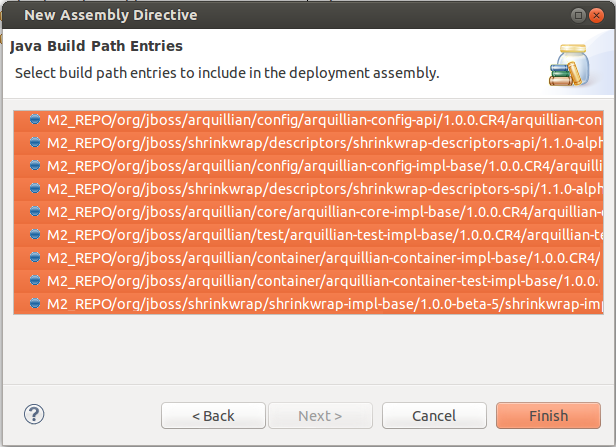
Now Select all the libs
Configuring Persistence
Now go to persistence.xml found under src/main/resources/META-INF/
and make sure you setup the persistence-unit correctly based on your datasource in Jboss standalone.xml
Here’s an example of my persistence.xml
<?xml version="1.0" encoding="UTF-8"?>
<persistence version="2.0"
   xmlns="http://java.sun.com/xml/ns/persistence" xmlns:xsi="http://www.w3.org/2001/XMLSchema-instance"
   xsi:schemaLocation="
        http://java.sun.com/xml/ns/persistence
        http://java.sun.com/xml/ns/persistence/persistence_2_0.xsd">
   <persistence-unit name="primary">
      <!-- If you are running in a production environment, add a managed
         data source, the example data source is just for proofs of concept! -->
      <jta-data-source>java:/jdbc/lazyprimeDS</jta-data-source>
      <properties>
         <!-- Properties for Hibernate -->
         <property name="hibernate.hbm2ddl.auto" value="create-drop" />
         <property name="hibernate.show_sql" value="false" />
      </properties>
   </persistence-unit>
</persistence>
And inside my JBoss application server, I have configured my datasource inside standalone.xml found under standalone folder.
Here’s a snippet code also of my standalone.xml
<datasources>

		 <datasource jta="true" jndi-name="java:/jdbc/lazyprimeDS" pool-name="LazyPrime" enabled="true" use-ccm="false">
                    <connection-url>jdbc:postgresql://localhost:5432/lazyprime</connection-url>
                    <driver>postgresql-jdbc4</driver>
                    <pool>
                        <min-pool-size>0</min-pool-size>
                        <max-pool-size>5</max-pool-size>
                        <prefill>true</prefill>
                        <use-strict-min>false</use-strict-min>
                        <flush-strategy>FailingConnectionOnly</flush-strategy>
                    </pool>
                    <security>
                        <user-name>postgres</user-name>
                        <password>apassword</password>
                    </security>
                    <validation>
                        <validate-on-match>false</validate-on-match>
                        <background-validation>false</background-validation>
                        <background-validation-millis>1</background-validation-millis>
                    </validation>
                    <statement>
                        <prepared-statement-cache-size>0</prepared-statement-cache-size>
                        <share-prepared-statements>false</share-prepared-statements>
                    </statement>
                </datasource>

</datasources>
After you make sure your datasources is configred correctly, go to your Server View Panel in eclipse right click on your Jboss and click Add and Remove.

Add your project to the right panel.
After this start your server and full publish you project (right click on the project inside the server and full publish), and it should deploy successfully.
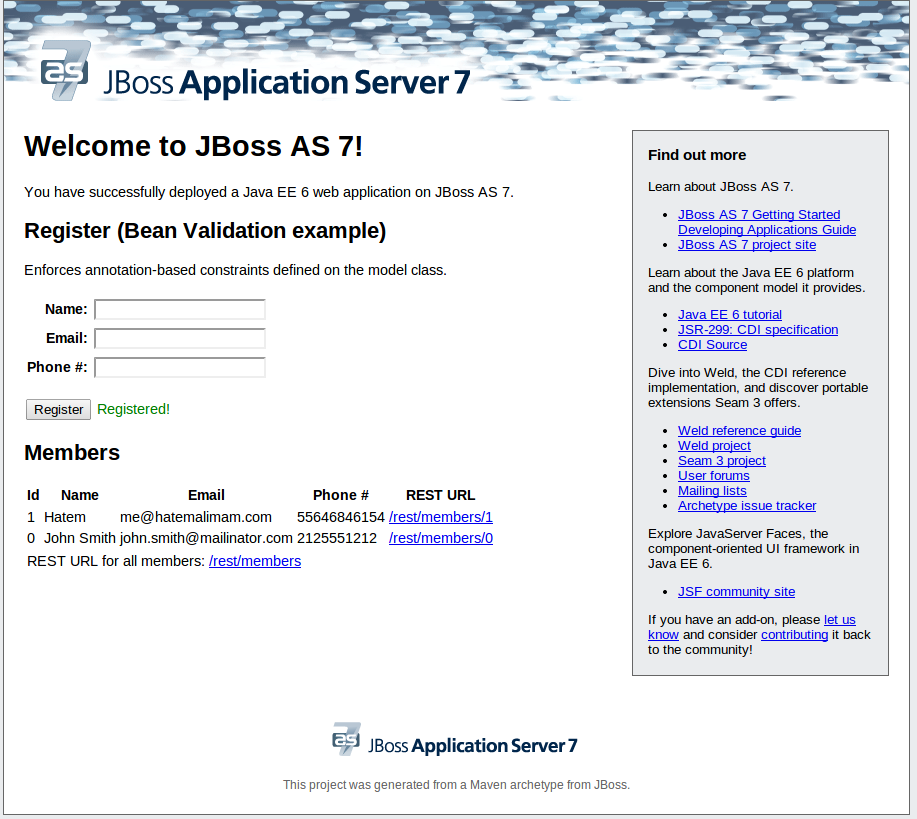
Now the first time the project execute will create tables into your database according to hibernate create-drop, the maven template has one model/entity called Member ( you will see that a table created in your schema called member with one row interested).
In order to maintain the records from dropping each time we start the application go to the persisntance.xml and comment
<!--<property name="hibernate.hbm2ddl.auto" value="create-drop" /> -->
and of course if you need to drop it and re-create it just uncomment the line and start the application. For more info on this follow this link.
Go and visit http://localhost:YOUR_AS_PROT/lazyprime/faces/index.xhtml
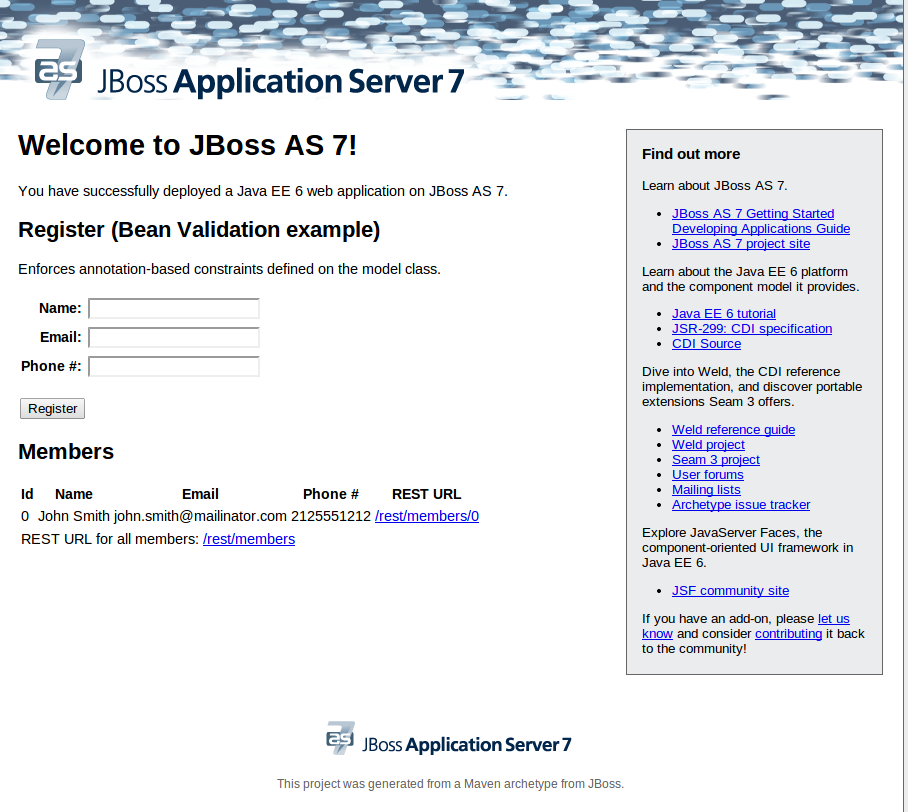
Test the insertion of the DB
Add Primefaces. (3)
Before adding primefaces, we should add the API of JSF into the project.
Open your pom.xml under your project’s root folder and add the following dependency under dependencies
<dependency>
	<groupId>org.jboss.spec.javax.faces</groupId>
	<artifactId>jboss-jsf-api_2.1_spec</artifactId>
	<version>2.1.26.Final</version>
</dependency>
Now add Primefaces
under repositories
<repository>
    <id>prime-repo</id>
    <name>PrimeFaces Maven Repository</name>
    <url>http://repository.primefaces.org</url>
    <layout>default</layout>
</repository>
under dependencies also add dependency
<dependency>
    <groupId>org.primefaces</groupId>
    <artifactId>primefaces</artifactId>
    <version>4.0</version>
</dependency>
now run
mvn clean compile package eclipse:eclipse
and don’t forget to reconfigure you deployment assembly in project properties to re-import the libs
Please remember also that the project is available on Github
![]()
Hi,
Thank you for putting up this tutorial, a lot of great information. I followed this whole tutorial and after deploying to Jboss, I’m receiving an HTTP 404 “JBWEB000124: The requested resource is not available.” This is my first time with Jboss, so I was wondering, is there something that I need to configure/edit before deploying .war files to jboss besides my standalone.xml? I can’t seem to find any relevant help on google, so any suggestions you have would help.
Thanks again.
Will